OneNote Portfolio Template Tutorial
Downloading and Opening the Template
- Download the Electronic (OneNote) Portfolio Template
- Choose a location to save the OneNote template when prompted.
- Open the OneNote template from the location where it was saved.
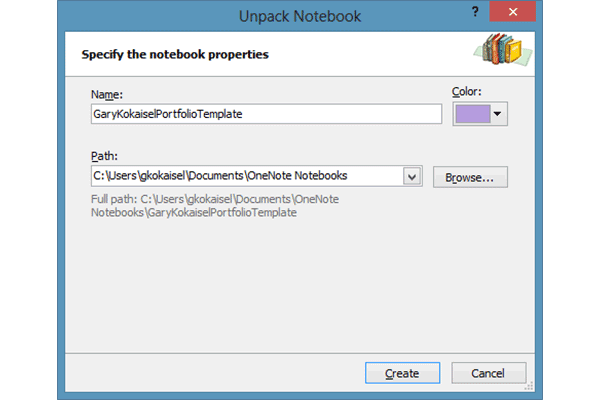
- You will be prompted to Unpack the Notebook. At this time you can specify some properties. You will want to personalize the name of the notebook. If you wish, you can change the color as well. I recommend leaving the Path as it is by default. Click Create when you finish specifying the properties.
Navigating and Editing the Template
Inserting your transcript or other documents into your template
Tip #1: Attach a document or file
To keep a copy of any document or file as part of your notes, you can attach it to your notebook page. Double-clicking the attachment icon will open the document or file in its intended program (for example, a Word document attachment will open in Microsoft Office Word if it is installed on your computer).
- On the Insert menu, click Files.
- In the Choose a file or a set of files to insert dialog box, navigate to the location of the file that you want to insert, and then click to select it. (To select multiple files, hold down the CTRL key while you click to select additional files.)
- Click Insert. A copy of the file is inserted on the current page and shown as an icon
that you can double-click to open or view the document or file.
Note: OneNote will attach a copy of the source document or file. OneNote does not maintain a link to the source file. If the source file is updated later, those changes will not appear in the copy you attached.
Tip# 2: Insert a document or file as a printout
When you want to insert information from other files on your computer without attaching or linking to the files, you can insert a picture or "printout" of the information by using the OneNote printer driver. Instead of actually printing the file onto paper, the printer driver sends the printout to your notebook electronically. You can position the printout anywhere on a page. You cannot open and edit the printout as if it was the source file, but you can copy text from the printout and paste it anywhere for editing. You can also annotate the printout pictures with additional notes by typing or writing over them.
- On the Insert menu, click Files as Printouts.
- In the Choose Document to Insert dialog box, navigate to the location of the file that you want to insert, and then click to select it. (To select multiple files, hold down the CTRL key while you select the files.)
- Depending on the type of file you are inserting, OneNote will attempt to launch the
source program for the file and then print its contents directly to the current notebook
page as a picture.
Note: If you are trying to insert a document that is password-protected, you must enter the correct password before the document can be inserted into OneNote.
Tip #3: Reposition a file printout picture on the page
By default, each page of an inserted document or file is placed in your notes as a separate picture. You can move inserted printout pictures wherever you want them.
- Select the picture by moving the pointer over it and then clicking the dashed blue border or the picture handle alongside the picture.
- Click and drag the picture to a new location.
Tip #4: Copy text from a file printout picture
Unlike most programs, OneNote allows you to copy text from an inserted "print" image and paste it elsewhere for editing.
- Right-click the printout image, and then do one of the following:
- Click Copy Text from this Page of the Printout to copy the text from only the currently selected printout picture.
- Click Copy Text from All the Pages of the Printout to copy the text from all of the pages of an inserted printout picture.
- Navigate to the page in your notebook (or to another program) where you want to paste the text, and then press CTRL+V to paste the copied text.
Share your portfolio with your committee
Begin by clicking on File, and Share. Then, follow the steps below.
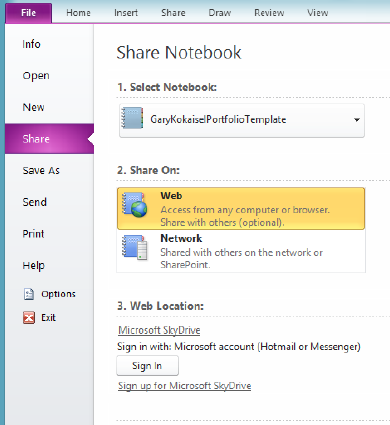
- Select Notebook. Your notebook should already be selected
- Select to share on Web. This should be selected already by default.
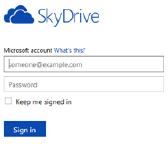
- Sign in to your SkyDrive account. Use your Atlas email address and password.
-
Note: If you have never signed into your SkyDrive account, you will need to do that first. Direct your browser to http://skydrive.com and log in with your Atlas email address and password.
-
- After signing into your SkyDrive account, all of the Personal and Shared Folder you
have on your SkyDrive account will appear. You will need to create a New Shared Folder
to save your template and share with the committee members. To do this, click on “New
Shared Folder”.
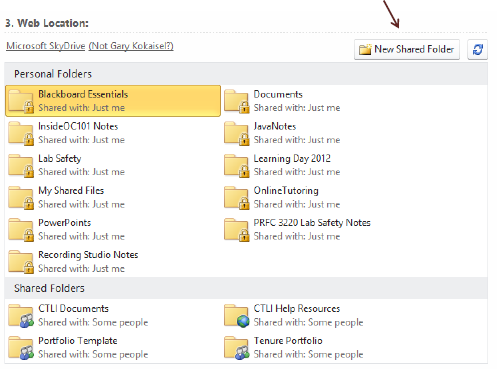
- This will launch a web browser where you will be prompted to create a new shared folder
within your SkyDrive account. Give the folder a name.
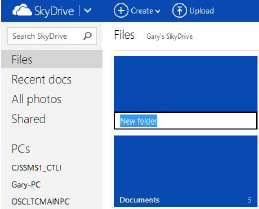
- Left click on the folder you just created and click on “Sharing” from the top menu

- You have a couple of sharing options. My recommendation is to send by email. Enter
in the Atlas email of everyone you want to have access separated by comma. You can
always return here and email additional people as needed. You committee members will
want to comment on your portfolio, so leave the box checked to allow recipients to
edit.
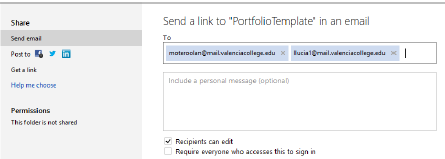
- Return to OneNote and click the “Refresh” icon
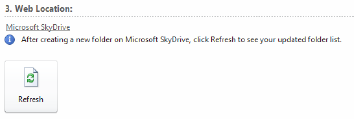
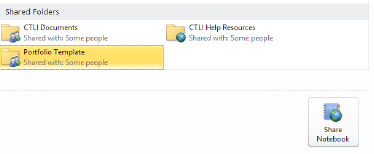
- The new shared folder you created will be listed on Shared Folders. Left click to
select the folder, and click the “Share Notebook” icon.
- You will get a confirmation popup window, which will allow you to email a link to additional people if you wish. If you do not have additional people to email the link to then click “No, Thanks” to finish.